Integrating Custom Webhooks
Webhooks allow CTFd to send relevant data to an HTTP endpoint based on certain events happening CTFd. In this tutorial we'll integrate a custom webhook that is triggered by a First Blood event, which is a type of scoring where the first user who solves a challenge is awarded with additional points.
Webhooks are currently only available in certain Hosted CTFd tiers and CTFd Enterprise.
To learn more about custom CTFd webhooks, you can refer to its documentation.
Server configuration
To add a webhook target URL to a CTFd instance, it would first need to pass through CTFd's validation process. For it to pass, the endpoint must:
- Respond to CTFd's initial
GETrequest - The reponse should contain an HMAC-SHA256 hash of a CTFd-generated token and the shared secret of your CTFd instance
For more information, you can refer to the documentation for validating endpoints.
CTFd provides ready-made debugging applications for us to use as a base for implementing the feature above. In this example, we'll use the Flask debugging application. For a more in-depth explanation as to how the Flask and PHP application is set up you can check out this tutorial.
Now, let's setup the application so that it passes CTFd's validation and receive webhook requests.
Requirements
- Flask: to run and serve the application
- ngrok or bore: to expose the local development server publicly
Setting up the server
This setup is for demonstration purposes only. It uses a development server and does not include instructions on how to make your endpoint secure. Endpoint security is further discussed in the documentation, you can check it here.
Download the Flask debugging application, and rename it to
app.pyfor easy reference.Create a folder, and name it however you want. Then, place the
app.pyfile inside the created folder.Install the Python dependencies specified in requirements.txt
Copy your CTFd instance's Shared Secret.
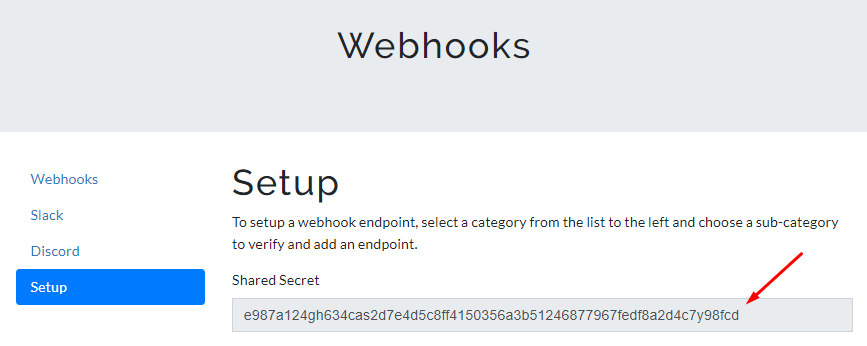
Set the Shared Secret in the
WEBHOOK_SECRETenvironment variable.export WEBHOOK_SECRET="e987a124gh634cas2d7e4d5c8ff4150356a3b51246877967fedf8a2d4c7y98fcd"Run the Flask application, and take note of the port number. In this example it's port
5000. Then, quit the application.python app.py
Environment: production
WARNING: This is a development server. Do not use it in a production deployment.
Use a production WSGI server instead.
Debug mode: off
Running on http://127.0.0.1:5000 (Press CTRL+C to quit)Install ngrok. You can refer to their documentation for the instructions.
Once
ngrokis installed, run the Flask application again.In a separate terminal, run ngrok with the port number of the Flask application.
ngrok http 5000

Session Status                online
Account                       <account-name> (Plan: Free)
Version                       3.1.0
Region                        <region> ()
Latency                       -
Web Interface                 http://127.0.0.1:4040
Forwarding                    https://<subdomain>.ngrok.io -> http://localhost:5000

Connections                   ttl     opn     rt1     rt5     p50     p90
                              0       0       0.00    0.00    0.00    0.00
Using your browser or cURL, go to the forwarded address,
https://<subdomain>.ngrok.io/?token=123, with a sample token123. You should expect a JSON response with an HMAC-SHA256 hash of the sample token and theWEBHOOK_SECRETenvironment variable we just added.

In the terminal where we ran Flask, you should receive a server log similar to this, with a status of 200.
127.0.0.1 - - [01/Jan/2022 07:18:43] "GET /?token=123 HTTP/1.1" 200 -
Once the endpoint works, we will need to add it to CTFd as our target webhook URL.
Adding a Webhook
Navigate to the Admin Panel.

Click the Plugins dropdown menu, and select Webhooks.

Add your configured webhook target URL and click Validate & Add.
In this example, it would be
https://<subdomain>.ngrok.io. Make sure not to include thetokenparameter, CTFd will automatically add it.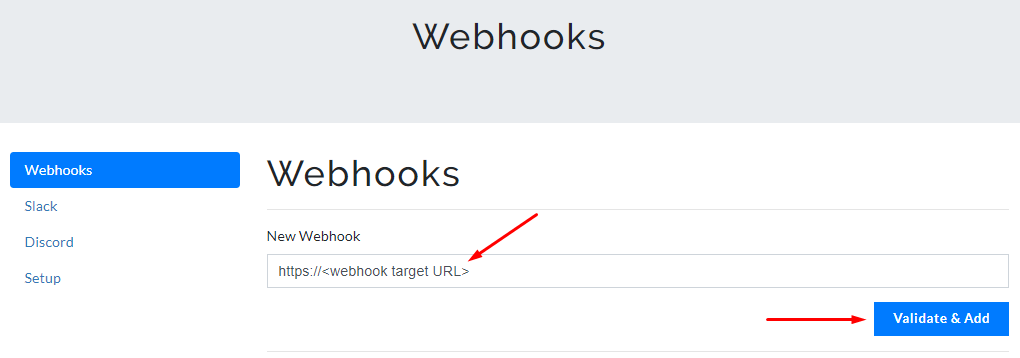
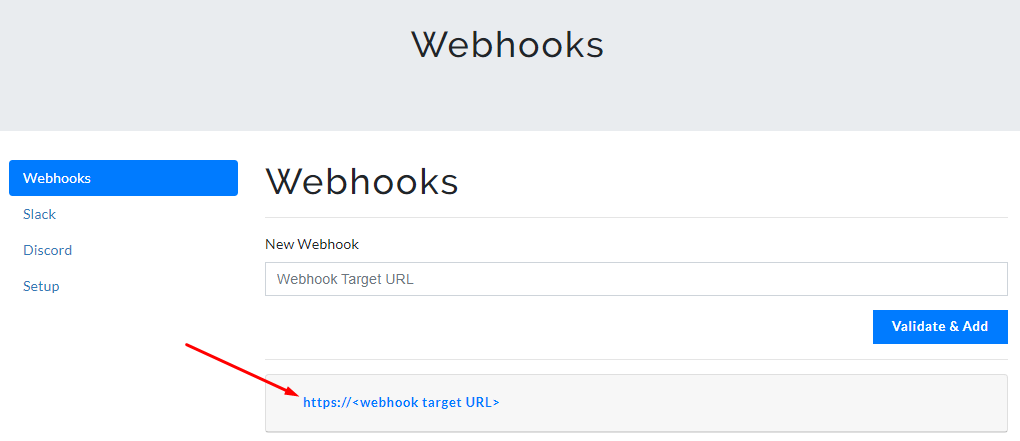
If the endpoint passes validation, it should appear below the input box (as shown below). You can then choose one or multiple events by clicking on the URL.
Testing the Event Trigger
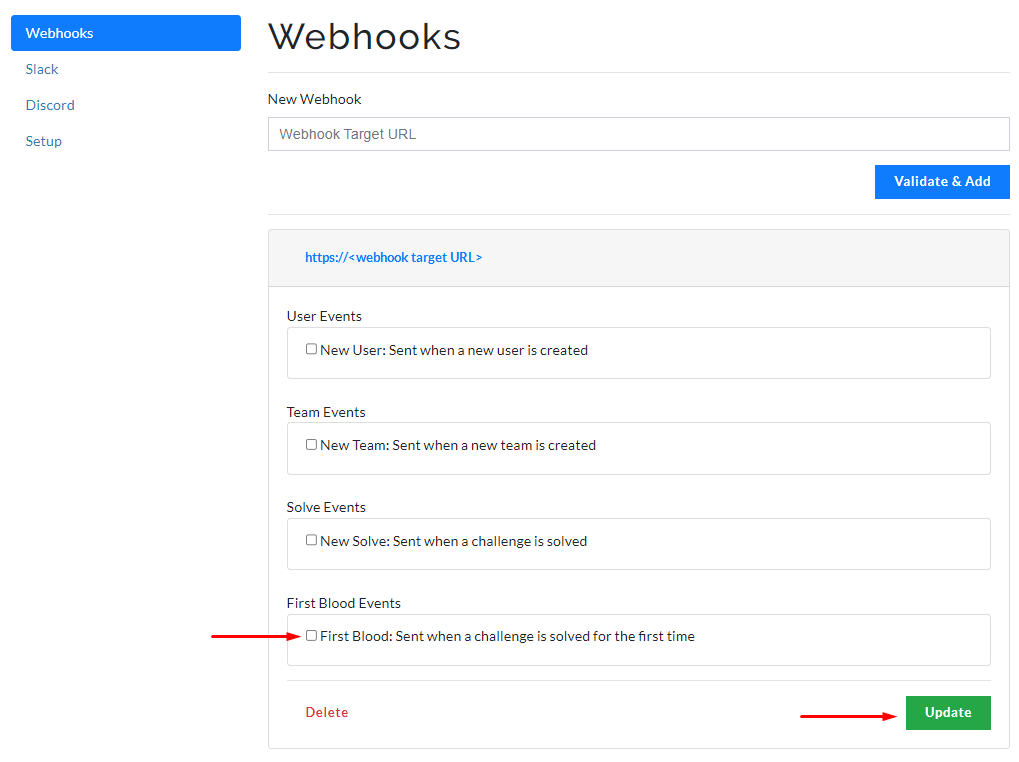
Select the First Blood event and test the webhook by submitting a correct answer to a newly created challenge. CTFd should send a webhook POST request to the target endpoint containing the details of the submission.
Go to webhooks, select First Blood Events, and click Update.
Submit a correct answer to the challenge.

Open your terminal where the Flask server is running, and inspect the
POSTrequest sent by CTFd. You should see a request header and request body similar to what you see below.You can also check out the different responses based on the different events here.
http://d00c-89-39-107-205.eu.ngrok.io/
Host: d00c-89-39-107-205.eu.ngrok.io
User-Agent: CTFd-Webhook
Content-Length: 140
Accept: */*
Accept-Encoding: gzip, deflate
Content-Type: application/json
Ctfd-Webhook-Event: team.created
Ctfd-Webhook-Signature: t=1616335588,v1=9e8cdd253434b74119ff44a119bb2d93e3b78a3a6a1a52d71e1bf70c36c55234
Sentry-Trace: 3e8641d6696a4190ba634e35de7bcdtg-bv9f2938465208aa-1
X-Forwarded-For: 192.168.1.1
X-Forwarded-Proto: https

{"challenge": None, "team": None, "date": "2022-01-01T07:18:43.106012+00:00", "type": "correct", "challenge_id": 1, "id": 1, "user": None}
127.0.0.1 - - [01/Jan/2022 07:33:20] "POST / HTTP/1.1" 200 -
In conclusion, that's how you add a custom webhook in CTFd. However, since the webhook only sends a webhook request to the target endpoint, the user or team wouldn't be awarded any score yet.
In order to award a user, the server must interact with CTFd's API. We'll go over this in more detail in the following tutorial.